

Wednesday, April 19, 2017
If you're not incorporating a lesson on circuit-diagramming, you can probably skip this step.
Before we get into the nitty gritty of actually making our felt wristbands for our light-up wristband, we need to give some thought to the positioning of the components. The easiest path is to just put all the components on top of the wristband (not on the inside). Your piece of felt then only needs to be about the circumference of your wrist plus 1-inch. This will give some space for the Velcro overlap and wriggly wrists.
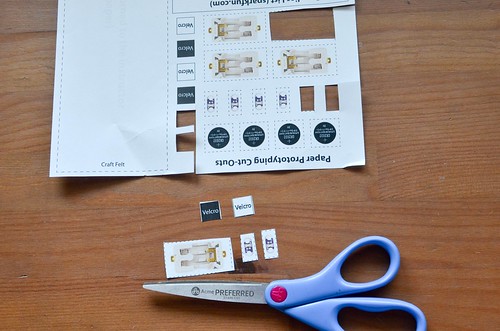
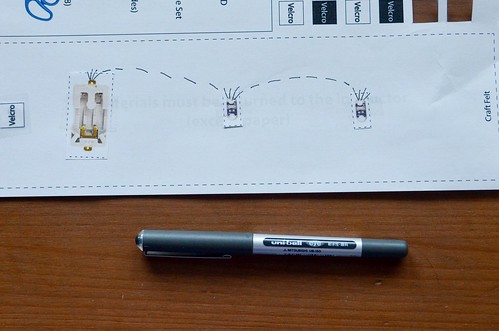
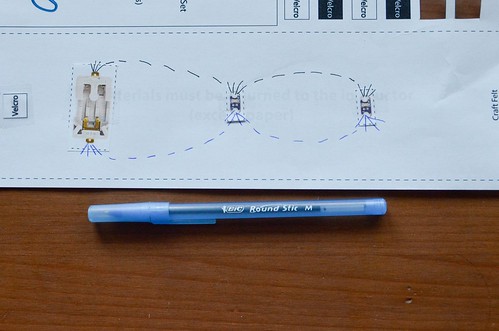
In a classroom setting, I'd incorporate some paper prototyping after sewing and circuits have been introduced. And then we'd paper prototype using the cut-outs below (print at 50% scale). Colored pens/pencils can be used to simulate the positive and negative strands of conductive thread. Paper Prototyping is essentially creating a model of what you'll be building with actual components, felt, and thread next. It's helpful when creating a more complex design (such as with the battery holder inside the wristband and LEDs outside of the wristband).
Paper prototyping is good for determining what pieces should go where for the most attractive and best fitting final product. If you're just going to stick everything on one side of the felt, then it's not fully necessary.


0 comments:
Post a Comment